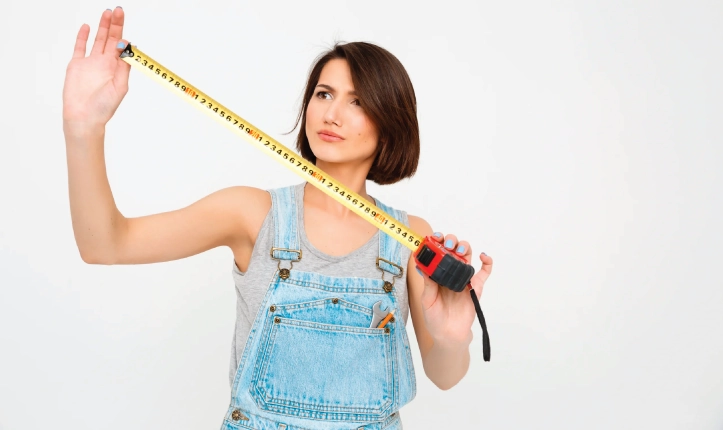
Wondering how to measure your container before you design a label for it? This should be your first step each time you add a new container size or shape to your product line. Do it before you plan out the label design and artwork! Here’s our tips for how to do it and things to watch out for.
Container Shape
If your container is a regularly-shaped round bottle or tin, or a square or rectangle, measuring is very easy.
Round Containers
Width
If you have a flexible measuring tape, just wrap that around the bottle to get its circumference. Don’t have a flexible measuring tape? You can use a piece of string or a piece of paper. Wrap it around the bottle, mark the end, then lay it flat and measure it with a ruler.
You can also measure the bottom of the bottle, multiply that number by 3.14 (pi), and get the circumference.
To create a gap between the label ends, subtract 1/8 to 1/4 inch from the circumference for the label width. This is our suggested method. To have an overlap, add 1/8 to 1/4 inch.
Height
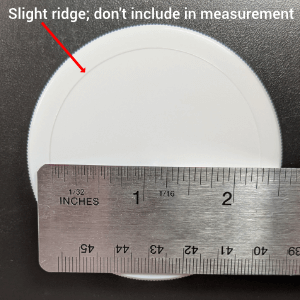
Round bottles sometimes have necks that are a different diameter, or a curve where the side of the bottle meets the bottom. Sometimes they have decorative ridges or patterns. Do not include these areas when measuring your container’s height. You can decrease the height by 1.8 inches to have more flexibility in placing labels when applying them.
Square or Rectangular Containers
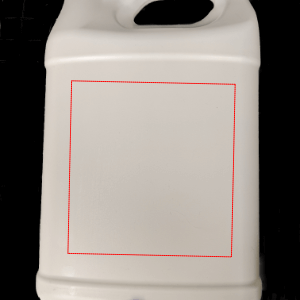
These are incredibly easy. Measure the height of the container, then the width of the container. If there are any decorative ridges or if the edges are rounded, measure inside those areas.
Once again, we recommend subtracting about 1/8 inch from both to make the label placement easier.
But Wait…
Some containers that appear to be round or rectangular may not be. And those are the ones that we worry about.
Consider the shape of your container or packaging when designing labels, especially if it has curved or tapered areas.
These irregular containers cannot use labels designed for flat, round, or square surfaces. The labels can come off or get wrinkled, torn, or not stick properly. The ends might also overlap messily.
They just look wrong. Not the image you want your products to present!
Check First
How can you determine if your container has a tapered or otherwise shaped that will affect your labels? Once again, a ruler comes in handy. Or in the case of the convex plastic container shown in our examples below, a level.
A customer sent us this container, to ask why their labels weren’t working. We put our level on the plastic container, and as you can see, the surface slopes down from the center. It may look square from above, but it’s not. Putting a square label on this surface will lead to wrinkles, as our customer discovered.
Seems like a regular square or rectangular label might fit here.

But a closer look reveals that the shape is convex. It needs a more curved label to avoid creasing.
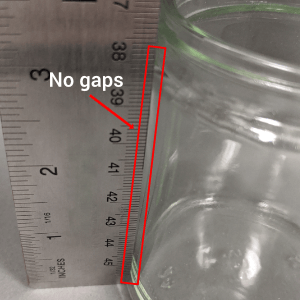
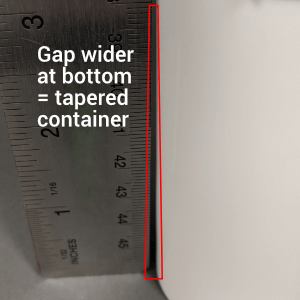
To check for tapering, stand the end of a solid ruler or straight edge on a flat surface. Place the container close to the straight edge, with its bottom on the same surface. Is the straight edge against the surface of the container all the way along the side, or is there a gap somewhere? (You can also use this method to check for concave or convex areas.)
If your container is flexible, such as thin plastic, you should look for curved or sloping areas. Ensure that you examine the container in the same state as when you will label it.
For example, label it when full and examine it when it is full. Similarly, label it when empty and examine it when it is empty. This may make a difference.
What If I Have an Irregular Container?
When you send us label artwork, we assume you have checked it thoroughly against your needs. We almost always create a digital proof (unless you decline that) with all the specifications you send us. Your job doesn’t enter production until after you approve that proof.
We print labels as you want, using your chosen materials and colors. Any of that stuff comes out wrong? It’s our responsibility to correct it and we take that very seriously.
On the other hand, if we print your label to your exact specifications, but it does not work on your containers, that falls outside the range of our quality guarantee. We cannot know your plans for using the labels or the shape of your container. Save yourself some time and aggravation by making sure it’s right the first time.
Options
If your container is indeed an irregular shape, don’t despair. It may be more difficult to measure your container, but you can still order labels that will look amazing and draw in customers. We recommend that you do any or all the following:
Engage a packaging designer. Ensure that they have knowledge in print design, not just digital or graphic design. Designing for physical objects is fundamentally different than web or image design.
Give them a sample of your container so they can see and measure it themselves. They should be able to prototype a label design for you. Labels designed for a tapered container need to have a bit of a curve to them; how big the curve is depends on how much the container tapers.
Once you have your label designed and you put in your order, request a print proof from us, for $65. A print proof will be identical in all ways to your final product. This will take more time because we have to print and mail you a copy using a mail service. We won’t run the order until you have received the proof and verified that you want us to go ahead.
Print proof costs slightly more than free digital proofs, but can save thousands of dollars in the long term.
Talk to us. Our team has over 70 years of experience in label design and printing. We can assist you in labeling even the most challenging containers.